
Here is a step-by-step guide on how to replace the rubber buttons in a Sega Mega Drive or Sega Genesis 3-button controller.
Please note that while this procedure is generally low-risk, it's important to exercise care when dealing with electronic components. This includes avoiding excessive force or static electricity, which can damage the internal components. If you're not confident in performing these steps, you might consider seeking professional help.
You will need:
- A new set of rubber buttons for the Sega controller
- A small Phillips screwdriver
- Isopropyl alcohol and cotton swabs (optional, for cleaning)
Procedure:
-
Remove the Screws: Turn the controller over to reveal the six screws on the back. Use the Phillips screwdriver to carefully remove these. Keep the screws in a safe place for later.
-
Open the Controller: Once the screws are out, carefully separate the two halves of the controller. You should now see the circuit board.
-
Remove the Circuit Board: Gently lift the circuit board out of the controller. Be careful not to tug or pull on any wires. It's not necessary to completely disconnect the board; you can leave it attached and just move it aside.
-
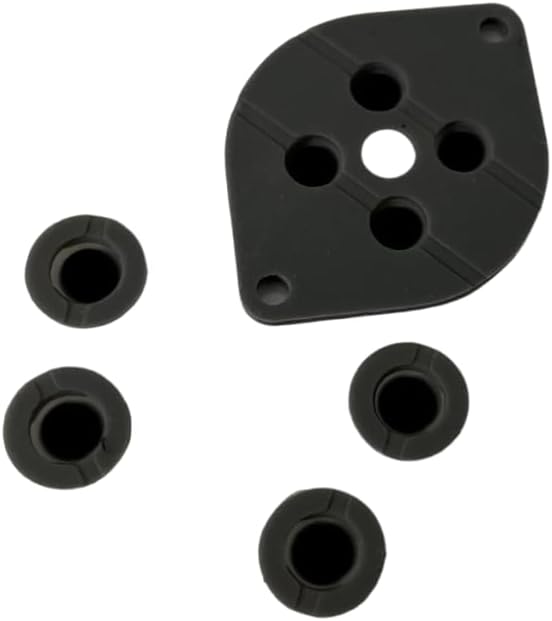
Remove the Old Rubber Buttons: With the circuit board removed, you should see the rubber buttons. They will likely be held in place by small plastic posts. Gently lift them out and set them aside. Be careful not to lose any small pieces.
-
Clean the Controller (optional): If the inside of the controller is dirty or dusty, you can use isopropyl alcohol and a cotton swab to gently clean it. Be sure to let it dry completely before reassembling.
-
Insert the New Rubber Buttons: Place the new rubber buttons into the controller. Make sure they are correctly oriented and that they sit properly on the plastic posts. They should fit snugly but not be forced into place.
-
Reinstall the Circuit Board: Carefully lower the circuit board back into the controller, making sure it sits properly. Ensure that the rubber buttons align correctly with the contacts on the circuit board.
-
Reassemble the Controller: Reconnect the two halves of the controller. Be careful not to pinch any wires. Insert and tighten the six screws.
-
Test the Controller: Finally, connect the controller to your console and test it to ensure that all buttons are working correctly.
Remember, it's important to be patient and careful throughout this process. If at any point you're unsure, it's better to seek help than risk damaging your controller or console. Good luck!
Go to our youtube video to see the procedure!
https://www.youtube.com/watch?v=K_zoO4IOnpc&t=7s&pp=ygUpcmVwbGFjZSBzZWdhIG1lZ2Fkcml2ZSAzIGJ1dHRvbiByZXRyb3VuaXQ%3D